If you follow the steps below, anyone can easily set up IP exclusion in Analytics.
The reason for excluding your IP address in analytics is primarily to maintain data accuracy.If your own activities or those of internal employees are included in the data, it can distort actual user behavior. For example, visitor counts and user behavior analysis may become inaccurate. By excluding your IP address, you ensure that only data from external users is collected. Therefore, I have prepared a manual on how to exclude your IP address in analytics settings for your reference.
Step 1: Define Internal Traffic (Setting Up IP Blocking for Yourself)
** Click on the gear icon in the bottom left corner, then go to Admin > Property > Data Stream.
 |
| . |
** Click on the arrow in the DATA Stream.
 |
| . |
** Click on the arrow in the Configure Tag Settings.
 |
| . |
** Click on "See more details"
 |
| . |
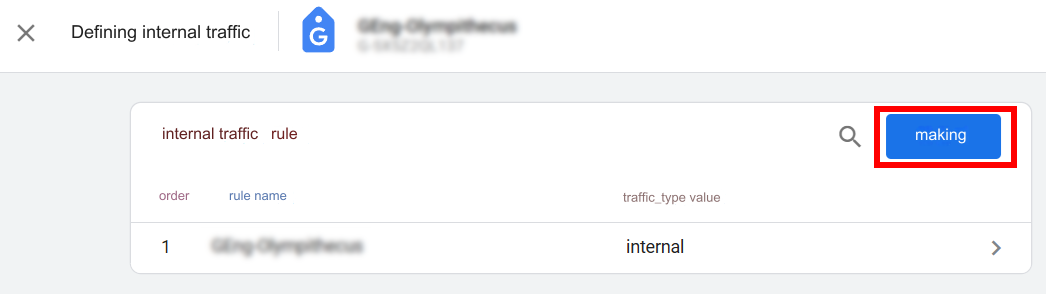
** Click on "Definition of internal traffic"
 |
| . |
** Click on "marking"
 |
| . |
** Enter the information exactly as shown below. Click on 'K' to input the IP value.
 |
| . |
 |
| . |
This concludes Step 1: Creating Internal Traffic Rules.
Step 2: Create a Data Filter (Excluding Your IP from Step 1)
** Click on the "gear icon" in the bottom left corner for settings. Then, click on 'Data Filters'.
 |
| . |
** Click on "Create a fillter".
 |
| . |
** Click on " Internal traffic"
Then, please enter the information and check the boxes as shown in the image below.
After that, click on 'Making'.
 |
| . |
** Click on "Activate fillter"
 |
| . |
That brings us to the final step of creating the second-level data filter.
** For your reference,
you do not need to create additional comparison filters as shown in the image below.
your own IP will be excluded from Analytics without needing to create extra filters.
 |
| . |


No comments:
Post a Comment